 EN
EN
 fr
fr  de
de  es
es  it
it  ru
ru  pt
pt  ar
ar  ms
ms  id
id 


")
")

")


We have cooperated with more than 200 countries in solar energy projects and road lighting projects. We have exported products to many countries and participated in many important government projects around the world.


We have cooperated with more than 200 countries in solar energy projects and road lighting projects. We have exported products to many countries and participated in many important government projects around the world.

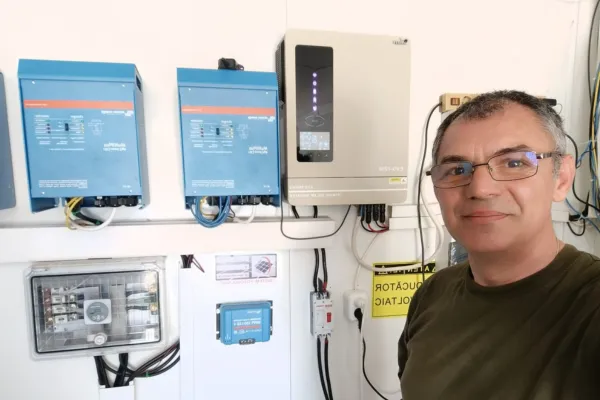
Anern has 17 years of experience in solar lighting and solar product manufacturing. Anern is headquartered in Guangzhou. With a production base of 30,000 square meters, our company has an R&D team of more than 100 people.
This solar inverter installation guide provides a step-by-step technical reference for installing Anern solar inverters, including off-grid, hybrid solar inverter, MPPT solar inverter, low-frequency solar inverter, and parallel inverter systems.
It is designed for professional installers, EPC contractors, system integrators, and technical teams, and covers safety requirements, wiring connections, battery integration, and commissioning procedures commonly used in residential and small commercial solar power systems.
This guide focuses on standard installation practices to support safe operation, stable system performance, and long-term reliability.
Before installing any solar inverter, ensure the following safety conditions are met:
Installation must be performed by qualified and trained personnel
Disconnect all AC and DC power sources before installation or maintenance
Follow local electrical codes and regulations
Never connect PV, battery, or AC wiring while the inverter is powered ON
Use insulated tools and appropriate personal protective equipment (PPE)
Proper safety preparation reduces the risk of electric shock, equipment damage, and system failure.
After receiving the inverter:
Inspect the outer packaging for damage
Check the inverter housing for visible defects
Verify all accessories are included:
Wall-mounting bracket
Mounting screws
Communication cables (if applicable)
User manual and documentation
Do not install the inverter if physical damage is found.
The inverter installation location must meet the following conditions:
Indoor or sheltered area (protected from rain and direct sunlight)
Solid, non-flammable wall (concrete or brick recommended)
Well-ventilated environment
Minimum clearance: ≥ 30 cm on all sides
Ambient temperature range: –10°C to 50°C
Avoid areas with high humidity, corrosive gases, or dust accumulation
Correct installation environment directly affects inverter lifespan and performance.
To mount the inverter:
Use the supplied wall-mounting bracket
Drill mounting holes according to bracket dimensions
Secure the bracket with expansion bolts
Hang the inverter vertically on the bracket
Ensure the inverter is firmly fixed and level
Remove the bottom cover before electrical wiring
Vertical installation supports proper heat dissipation.

Proper grounding is mandatory for safety and surge protection.
Connect the inverter grounding terminal to a reliable earth ground
Use grounding cable size according to local electrical standards
Ensure low grounding resistance
Incorrect grounding may cause electric shock or equipment damage.
When connecting AC wiring:
Install an external AC circuit breaker between the grid and inverter
Confirm correct wiring polarity:
L (Line): Brown or Black
N (Neutral): Blue
PE (Earth): Green/Yellow
Do not confuse AC input and AC output terminals
Select cable size based on inverter rated power
Tighten all terminal screws securely
Improper AC wiring may cause inverter malfunction or protection shutdown.

See the Complete Solar Inverter Wiring Diagram
For photovoltaic input wiring:
Install a DC circuit breaker between PV array and inverter
Verify PV open-circuit voltage does not exceed inverter maximum rating
Connect:
PV+ → PV+ terminal
PV− → PV− terminal
Use properly rated DC cables and insulated tools
Complete PV wiring before powering ON the inverter
Always double-check PV polarity to avoid inverter damage.
Ensure battery voltage matches inverter specifications
Install a DC breaker or fuse between battery and inverter
Connect BAT+ and BAT− correctly
Recommended battery capacity: ≥ 200Ah for stable system operation
Confirm lithium battery protocol compatibility
Connect battery power cables first
Connect BMS communication cable (RS485 or CAN)
Select battery type in inverter settings before startup
Correct battery configuration ensures accurate charging and protection.
For parallel systems:
Use identical inverter models
Follow master–slave configuration rules
Ensure battery cables are equal length
Connect parallel communication cables correctly
Configure parallel parameters before powering ON
Parallel inverter installation must follow manufacturer specifications strictly.

If supported:
Insert Wi-Fi or GPRS communication module
Secure communication cable connections
Configure system monitoring via mobile APP or web platform
Monitoring enables real-time system status and fault detection.


Before starting the inverter, confirm:
All wiring connections are secure
Grounding is completed
AC and DC breakers are OFF
Bottom cover is reinstalled correctly
Follow the correct startup sequence:
Turn ON battery breaker
Turn ON inverter power switch
Turn ON PV breaker
Turn ON AC input breaker
Check LCD display and system status
Incorrect startup order may trigger system protection.
Keep ventilation openings clean
Inspect wiring and terminals periodically
Do not overload the inverter
For long-term shutdown, disconnect PV, battery, and AC power
Regular inspection improves system reliability and service life.
To check solar inverter maintenance guide.
.webp)
.webp)
Solar inverter installation should be performed by trained and qualified professionals.
Yes. The installation principles apply to off-grid, hybrid, and parallel inverter systems.
Grounding protects users and equipment from electrical faults and lightning surges.
Excessive PV voltage may permanently damage the inverter.


")


